hétfő, december 27

U.S. Special Force DUMVEE - Chassis

First of all the SCMC memebers wish You a Merry Xmas and a Happy New Year!

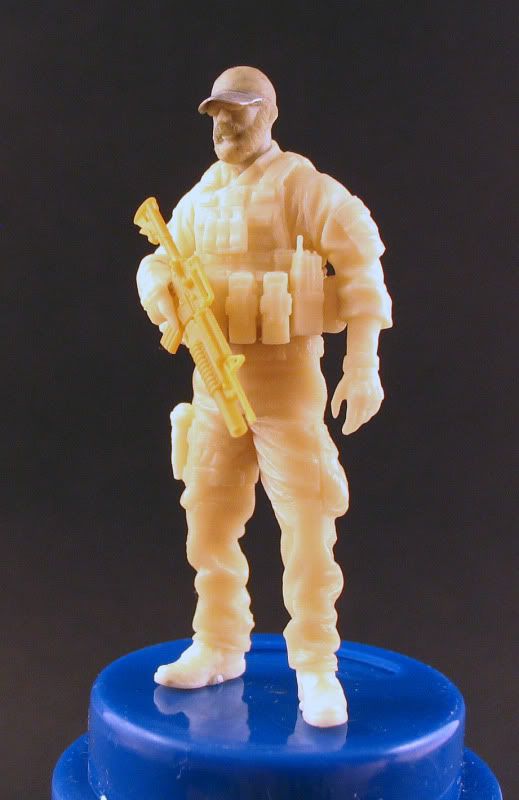
Well, my SF operator ask a a DUMVEE for christmas, and i was delighted to hear that ;)
I use the Tamiya M1025 for the base plus i got a Legend conversation set LF1212. The korean factory made fantastic work, all the resin parts are well detailed. I specially love those Super Swamper wheels!
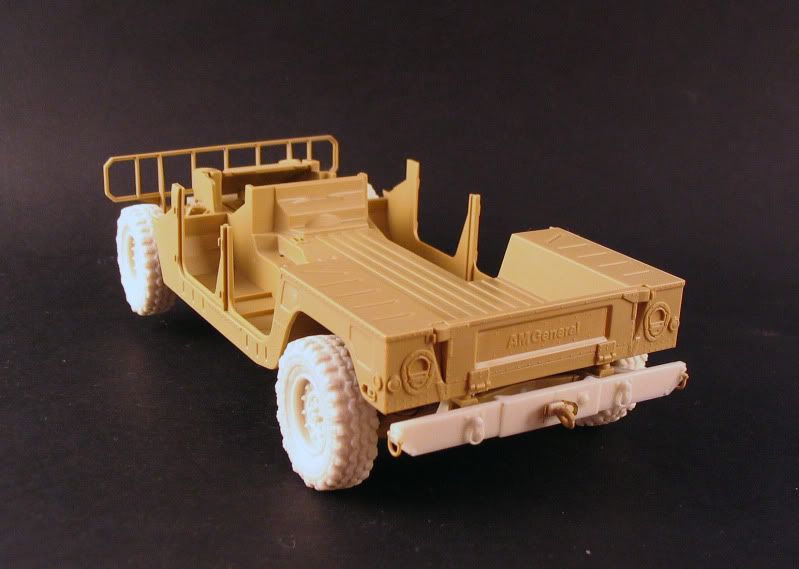
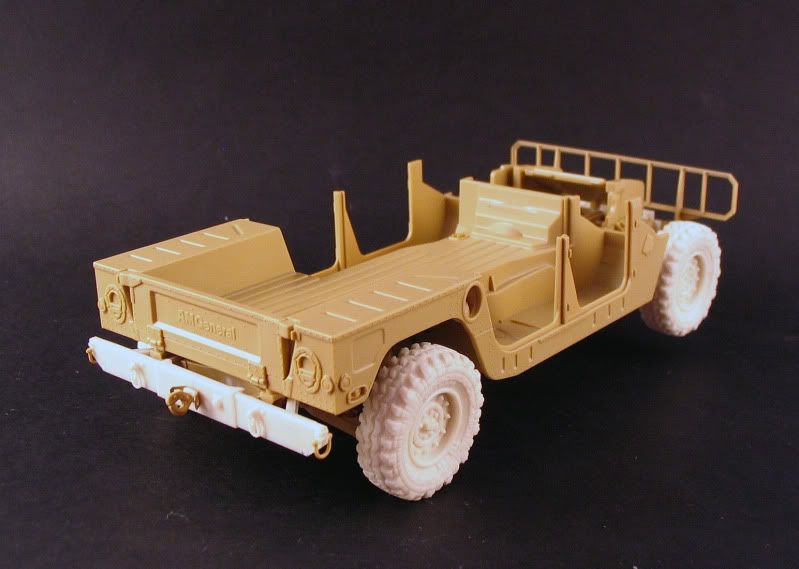
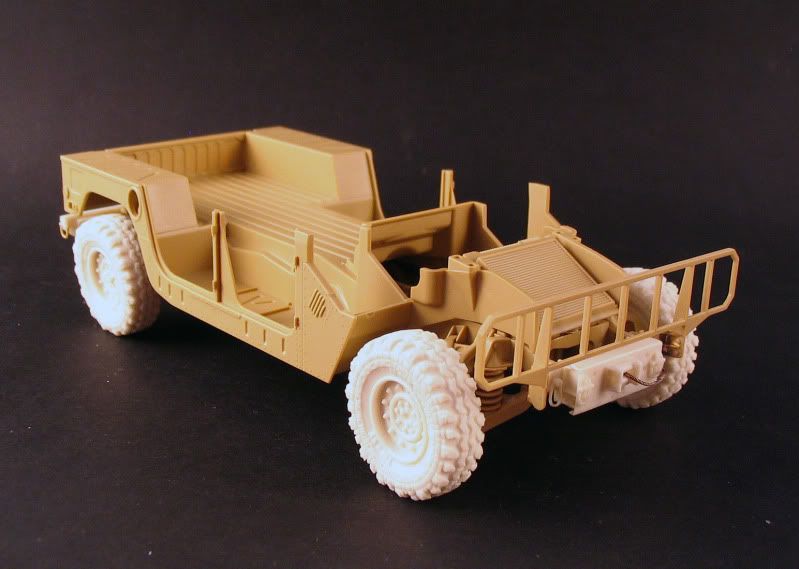
The front and the rear bumper glued on, so the chassis is ready.


péntek, december 10

U.S. Special Force Figure #1 - build and basecoat

After some WW2 theme i felt i have to make something different. For the new project, i choose Special Force (SF) and a  very interesting battlefield, Afghanistan. I plan to make a litttle vignette, but i have to choose one of my number of ideas.

BTW, here is the first figure i am working on. This kit is the Airborne Miniature's 3502 U.S.NAVY SEAL/SF. I remade an old Verlinden head, cause the most popular headwear is the baseball cap. So i sculpt a full cap, beard, and sunglasses for my warrior. That was my first try to scuplt something on a figure, and i have to say i love it! Next time i try to make a complete figure ;)


péntek, november 19

Pz III/L painting finished

I have finished the painting in 95 %.
The painting has been continued with signals (painted) and numbers (dry decals) applying. I have made the dry brushing on the basic colour with buff as on mending with yellow. I always use artist oils for dry brushing.
( I have never used acryl for dry brushing) When the oils dried, I have mixed two colours for chafing. Either is brighter than basic colour (nearly white), the other is dark (black and brown). I wouldn't have like to make an very rusty vehicle. Therefore I have painted chafing stains wherever was necessary, for example manholes, edges of armor and plates. This has been made with thined acryl paint. With some chafings I have made rusty runoff with oil and dry brushing technic. After all I have started weathering's makings. I used artist oils in tones of brown, MIG pigments (in light and dark tones) and Neutral Wash. I have applied the pigments in pits and corner thined by MIG thiner. Ere it dried fully, I had impregnated with pigment fixer. The upswings have been made by help of brush, artist oil, pigments and airbrush. I have plunged the brush in the thined mix of pigments and oils and blowed out with airbrush on armour. This technic has already known in the face of others. After drying I have applied the track. I have sweated quite a lot, because it hasn't like to set in his tidy place. This piece has got dark tone pigments that has been impregnated with pigment fixer.
This state is presently.

Bye!


szombat, október 9

Jaboschreck on Steyr 2000 A building 99% finished

I have finished the bulding phase of my Jaboschreck. It was fun to build it, and I have learned a lot from scratchbuilding during this project. Next time I will do some things different. for example Wood not always a good material. In case of vehicles maybe a bit better to use styrol sheet for this purpose. But I think it is a matter of personal taste.
I decided to build the folding roof wich was mentioned in Thomas Anderson's article (wich my main reference was). He mentions in the part of the original vehicle, but finaly he did not built it to his model. And as I noticed the Leadwarrior conversion kit was also based on his model, so it lacks the roof as well.
I have made the frame from evergreen rods, and some parts from tha Tamiya kit, and the tarp was made from epoxy putty.

Many parts are not glued togeather yet because It will be easyer to paint tham seperate.
After I took the pictures I have noticed that I bluetac-ed the windshield backwards, but I will take atention to this when it will be glued permanent.

Now comes the painting phase, what I like tho most!!

regards


kedd, szeptember 28

Sd.Kfz. 251/1 Ausf.D - part 12: Dry brushing and chip paint

In this stage i made the dry brushing with the camo colors lighter versions, and applied some scratch and wear on the vehicle. (The sandbag is unpainted)
I changed the background of the photos and try to set my camera better...I have to say, i know what will be my christmas gift ;)
Further weathering is on the way, so stay tune!


kedd, szeptember 21

continue of Pz III

I have continue the painting with a little leaching. I have done the dark washes on the tank. I used artist oil paint in VanDyck brown colour, that had been thined highly with MIG thinner ( P239). After 5-7 minutes expectation I have washed down the sloshed surfaces with MIG thinner. I left the surfaces here and there more darkly ( in corners, cracks, weld lines ) or more brightly ( armour-plate's area ).

Next missions : to apply the signals, numbers and dry brushing....


kedd, augusztus 31

Pz III/L painting after building

Dear Visitors,

After little pressure break the Pz III/L project is continue again.
I had been questing long time before I decided for Pz's camo pattern. Many manding appeared from summer of '43 on the eastern front. This Pz was pertaining in strength of Totenkopf where the painting hasn't been accreted yet.This gave me a little free hand in made of camo. ( certainly by right of archive photos )
After building it got a black primer colour. I always use Gunze colors for painting, because that can use well for airbrush painting. Pz's basic colour is Dark Yellow and the staines are USAF green that I brightned with white in different rate.

Some pics:


csütörtök, augusztus 26

Jaboschrek

I have started this model a yer ago, but had a big break in the building phase.
I have now restarted it, and this is the stage where I am now.
The main sections are not glued togeather yet.
I have used the DML Jaboschreck gun whit its own PE. I am not completly satisfied with the kit. Bad fitting, for a DML kit I have expected better. The PE parts are not so well engeneered as the leading PE manufacturers sets but it's do the job.

vasárnap, július 18

Sd.Kfz. 251/1 Ausf.D - part 11: The wash and decals

I laugh and cry at the same time, cause the Argentin team fall out of the WC2010, but my 2nd favorite, the Spanish team won the Cup...olé  :)

After some correction on the camo,and painted red primer under the missing parts,  i applied the washes at the details like nuts, bolts, lines with MIG's Dark Wash. I used this technik heavily on the lower side of the vehicle. For the decals, i chose different sets from the line of Archers Dry Transfers. That was the first time i used them, i have to learn how does it work perfectly, but i love it, it's so thin :) I seal the whole model with Gunze Flat Clear, luckily, it has not result a total matt surface, just enough to the following dry brushing.

Some actual pics:


vasárnap, június 27

Sd.Kfz. 251/1 Ausf.D - part 10: The camo is on

Well, here comes the summer, and the modellers are tempted by other activity out there, so thats why the rarely post  :)

But nowdays, between 2 match of the WC2010 - Vamos Argentina - i have some time to go on with my halftrack. The camo, that i research, has been painted on. I used Tamiya colors, cause its a durable base for the  next weathering steps. The base color is ligth green, the XF-71 Cockpit Green is almost perfect for the late war german green. The idea to use this color were came from a Phil Stutcinskas article in TMMI 111 (Bergepanther G). Thanks Phil! Next part of the camo were the brown. The XF-68 NATO Brown painted direct from the bottle, cause i think the late war browns were darker than the previous browns. This paint is the best i have ever work with... i dont know why, probably its brand new, so fresh with slightly pigments, it was a dream work :) The light color is rather white than yellow. I mixed  XF-2 White with a little bit XF-60 Dark Yellow as i "feel" on the archive photos.

So, the camo is on, and the fun can begin! Please note that the paintwork didnt get the varnish protection, and before it i have to correct little mistakes, but i was so excited to show how it looks like!!!

Here are the pics: